

A turntable cartridge is a crucial component that converts vinyl grooves into sound signals, ensuring high-quality audio reproduction. This guide explores its types, setup, and maintenance.
1.1 What is a Turntable Cartridge?
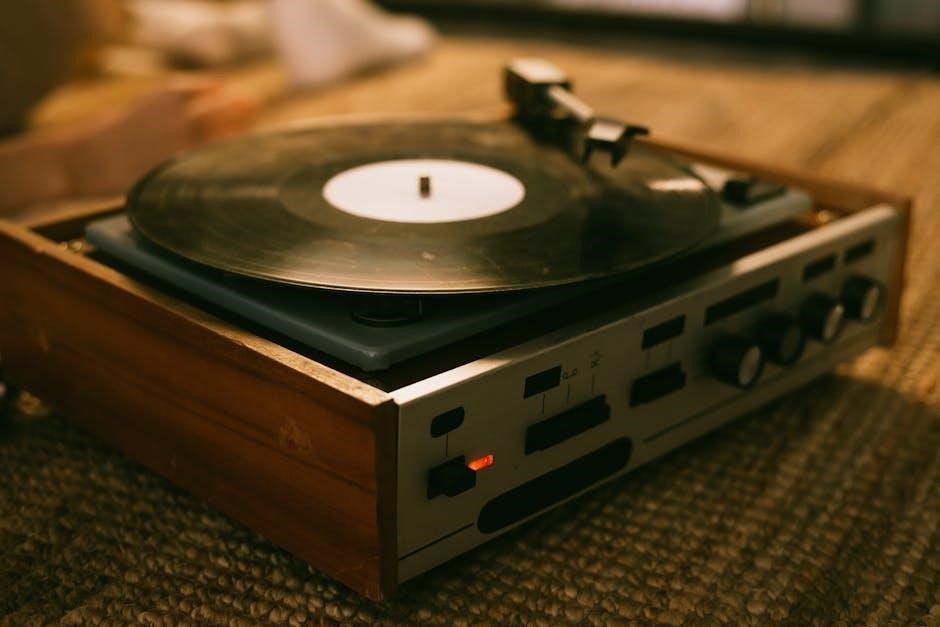
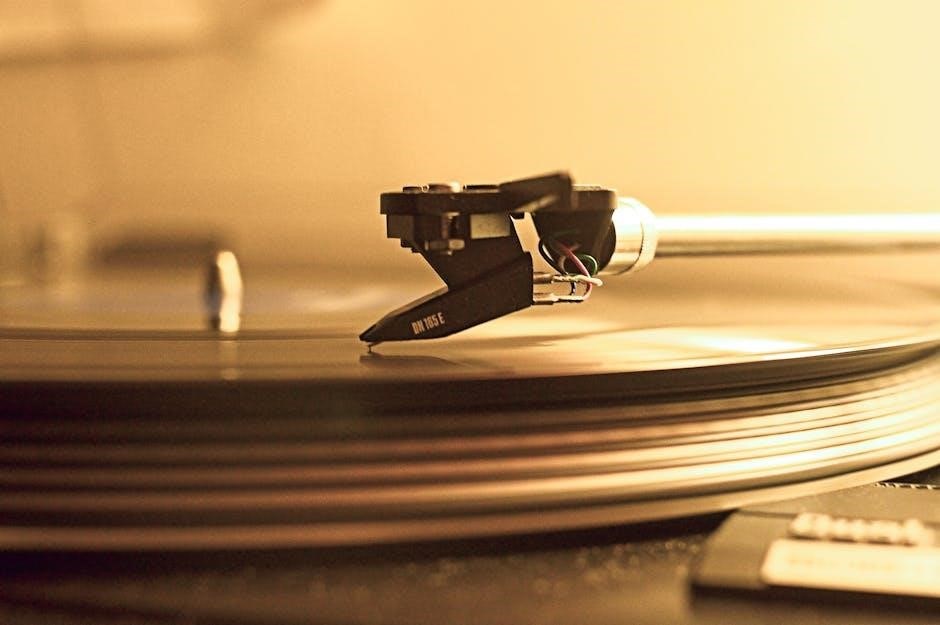
A turntable cartridge, also known as a phono cartridge, is the component mounted on the tonearm of a record player. It houses the stylus, which reads the grooves on a vinyl record. The cartridge converts the mechanical vibrations from the stylus into electrical signals, which are then amplified and played through speakers. Essentially, it acts as the bridge between the physical record and the sound system, ensuring accurate sound reproduction. Proper installation and alignment are critical for optimal performance and to prevent damage to the record or the cartridge itself.

1.2 Importance of Cartridge Quality in Sound reproduction
1.2 Importance of Cartridge Quality in Sound Reproduction
The quality of a turntable cartridge significantly impacts the sound reproduction; A high-quality cartridge ensures accurate tracking of the record grooves, resulting in clear and detailed audio. It minimizes distortion and delivers a balanced frequency response, enhancing the overall listening experience. A poor-quality cartridge can lead to mistracking, causing surface noise, distortion, and even damage to the record. Investing in a good cartridge is essential for vinyl enthusiasts to fully appreciate the richness and depth of their music collection. The cartridge’s ability to accurately translate vibrations directly affects the fidelity of the sound produced.
Types of Turntable Cartridges
Turntable cartridges are primarily divided into Moving Magnet (MM) and Moving Coil (MC) types. Each offers distinct sonic characteristics, making cartridge selection crucial for optimal sound reproduction.
2.1 Moving Magnet (MM) Cartridges
Moving Magnet cartridges are widely popular due to their simplicity and affordability. They feature a fixed coil with a magnet attached to the stylus, which moves within a magnetic field. This design makes MM cartridges robust and easy to maintain. They are also more forgiving of minor tracking force adjustments, making them a great choice for entry-level users. Additionally, MM cartridges are compatible with most standard phono preamps, eliminating the need for specialized equipment. Their balanced sound reproduction and durability ensure they remain a favorite among vinyl enthusiasts seeking reliable performance without breaking the bank.
2.2 Moving Coil (MC) Cartridges
Moving Coil cartridges are renowned for their high fidelity and detailed sound reproduction. They feature a lightweight coil suspended within a magnetic field, with the stylus attached to the coil. This design allows for precise tracking of record grooves, delivering nuanced audio with excellent dynamic range. MC cartridges are typically more sensitive than MM cartridges, requiring a compatible phono preamp to amplify the signal. While they are more delicate and require careful handling, their ability to capture subtle sonic details makes them a favorite among audiophiles seeking premium sound quality. Proper setup and maintenance are essential to maximize their performance and longevity.
2.3 Differences Between MM and MC Cartridges
The primary distinction between Moving Magnet (MM) and Moving Coil (MC) cartridges lies in their construction and performance. MM cartridges are more robust, easier to maintain, and compatible with standard phono inputs, making them ideal for entry-level setups. In contrast, MC cartridges offer higher sensitivity and superior sound quality but require a step-up transformer or specialized phono preamp. MC cartridges are lighter, allowing for better tracking, while MM cartridges are more durable. Sound-wise, MC cartridges provide greater detail and dynamic range, though they are more delicate and expensive. Choosing between them depends on your turntable’s compatibility, budget, and desired audio fidelity.

Choosing the Right Cartridge for Your Turntable
Selecting the right cartridge involves considering compatibility, sound preference, and budget. Ensure the cartridge matches your turntable’s specifications for optimal performance and sound quality, enhancing your vinyl experience.
3.1 Compatibility with Your Turntable Model
Ensuring your cartridge is compatible with your turntable is essential for optimal performance. Check the turntable’s specifications to match the cartridge’s mount type, whether it’s a standard or P-mount. Additionally, verify the recommended tracking force range to avoid damaging the stylus or the record. Some cartridges are designed for specific tonearm lengths or weights, so consult your turntable’s manual for precise requirements. Compatibility ensures proper alignment and tracking, leading to clearer sound reproduction and extended cartridge longevity. Always research or consult with experts to confirm compatibility before making a purchase for the best listening experience.
3.2 Understanding Tracking Force and Its Impact on Sound Quality
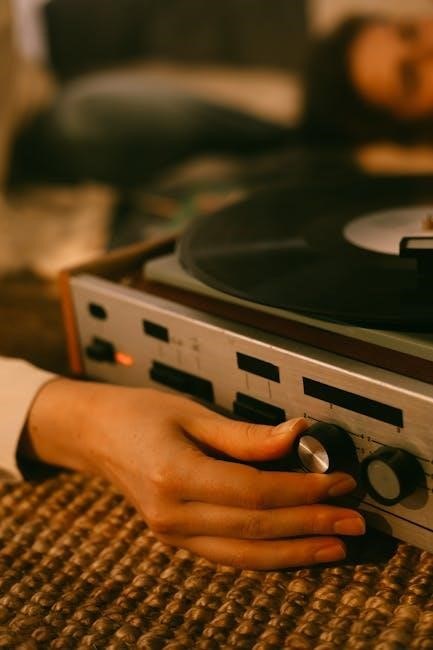
Tracking force, the pressure exerted by the stylus on the record, significantly affects sound quality. Proper force ensures the stylus stays in the groove, reducing distortion and wear. Too little force can cause skipping, while too much may damage the stylus or record. The ideal range is usually between 1-3 grams, depending on the cartridge. Adjusting the tonearm’s counterweight and balancing it ensures optimal tracking. Misalignment or incorrect force can lead to poor sound reproduction and shortened cartridge life. Always refer to your cartridge’s specifications for the recommended tracking force to achieve the best listening experience and protect your equipment.

Installing and Setting Up a Turntable Cartridge
Mount the cartridge to the headshell, align it properly, and secure it. Adjust the tracking force and ensure the stylus is level for optimal performance and sound quality.
4.1 Step-by-Step Guide to Mounting the Cartridge

Begin by carefully handling the cartridge, ensuring not to touch the stylus. Place the cartridge onto the turntable’s headshell, aligning the mounting holes. Secure it with the provided screws, tightening gently to avoid damage. Next, check the cartridge’s alignment by holding the headshell over the spindle and observing if the stylus extends evenly. Adjust the cartridge position as needed to achieve proper overhang, using a cartridge alignment gauge for accuracy. Once aligned, double-check all connections to the tonearm and phono preamp. Finally, test the setup by playing a record to ensure smooth tracking and clear sound reproduction.

4.2 Adjusting the Cartridge Alignment for Optimal Performance
Proper cartridge alignment ensures precise tracking, minimizing distortion and wear. Place the alignment gauge on the platter and position the cartridge so it’s parallel to the grooves. Adjust the headshell’s position, ensuring the stylus aligns with the grid. Secure the screws gently after achieving proper alignment. Check overhang by holding the headshell over the spindle; the stylus should extend slightly past. Use a magnifying glass for accuracy. Consult your turntable’s manual for specific instructions, as alignment procedures may vary. Proper alignment enhances sound quality and protects your records and cartridge.
Maintaining and Cleaning the Cartridge
Regularly clean the stylus with a soft brush and mild alcohol. Gently wipe the cartridge body to remove dust. Handle with care to prevent damage. For detailed cleaning methods, see Section 5.2.
5.1 Best Practices for Cartridge Maintenance
Regular maintenance is essential to ensure optimal performance and longevity of your turntable cartridge. Always handle the cartridge with care, as it is a delicate component. Clean the stylus gently with a soft-bristled brush or a specialized cleaning tool to remove dust and debris. Avoid touching the stylus tip, as oils from your skin can damage it. Use a mild alcohol solution for deeper cleaning, but never apply liquid directly to the cartridge. Check for dust buildup on the cartridge body and wipe it with a dry, soft cloth. Proper maintenance prevents distorted sound and extends the cartridge’s lifespan. Regular inspections ensure reliable performance and clear audio reproduction.
5.2 How to Clean the Stylus and Cartridge Body
Cleaning the stylus and cartridge body is vital for maintaining sound quality and preventing damage. Start by gently brushing the stylus with a soft-bristled stylus cleaning brush to remove dust and debris. Avoid touching the stylus tip, as skin oils can damage it. For the cartridge body, use a dry, soft cloth to wipe away dust and grime. If more thorough cleaning is needed, lightly dampen the cloth with distilled water, but never apply liquid directly to the cartridge. Avoid harsh chemicals or alcohol, as they can harm sensitive components. Regular cleaning ensures optimal tracking, reduces distortion, and extends the cartridge’s lifespan. Always clean in a well-lit area to inspect thoroughly.
Troubleshooting Common Cartridge Issues
Common cartridge issues include distorted sound, poor alignment, and improper tracking force. Verify cartridge alignment, check for stylus damage, and adjust tracking force to resolve these problems effectively.
6.1 Diagnosing and Fixing Distortion or Poor Sound Quality
Distortion or poor sound quality from a turntable cartridge can stem from improper tracking force, misalignment, or a damaged stylus. Start by checking the tracking force with a gauge to ensure it matches the manufacturer’s specifications. Next, verify the cartridge alignment using an alignment protractor to ensure proper geometry. If the issue persists, inspect the stylus for dirt or damage; clean it gently with a stylus brush or replace it if necessary. Finally, ensure the cartridge is securely mounted and the tonearm is balanced. Addressing these factors can significantly improve sound quality and reduce distortion. Regular maintenance is key to optimal performance.
6.2 Addressing Cartridge Alignment Problems
Cartridge alignment issues can significantly affect sound quality and record wear. To address this, start by consulting your turntable’s manual for specific alignment instructions. Use an alignment protractor to ensure the cartridge is properly positioned in the headshell. Check the stylus overhang by gently holding the headshell over the spindle; the stylus should extend slightly beyond it. Adjust the cartridge’s position to achieve the recommended overhang; Ensure the cartridge is parallel to the record grooves and adjust its angle if necessary. Use the tonearm balance to fine-tune the setup by moving the counterweight. If issues persist, consider professional calibration or cartridge replacement. Proper alignment enhances sound quality and reduces record wear. Regular checks and adjustments are crucial for optimal performance.