

Welcome to the Singer Sewing Machine User Guide! This comprehensive guide helps you master your Singer sewing machine, from setup and maintenance to advanced stitching techniques. Learn to troubleshoot common issues, explore vintage models, and discover essential accessories. Whether you’re a beginner or an experienced sewer, this guide ensures you get the most out of your machine.
1.1 Brief History of Singer Sewing Machines
Singer Sewing Machines have a rich history dating back to the 1800s, revolutionizing sewing with the first practical sewing machine. Founded by Isaac Singer, the company became a global leader, introducing innovations like the vibrating shuttle and portable designs. Singer’s legacy continues to inspire sewers worldwide with durable, versatile machines for every skill level and project type.
1.2 Importance of Using the User Guide
The Singer Sewing Machine User Guide is essential for optimal performance and longevity. It provides step-by-step instructions, troubleshooting tips, and maintenance advice. By following the guide, users can avoid common errors, ensure proper setup, and master advanced features. This resource empowers sewers of all levels to maximize their machine’s potential and achieve professional-quality results consistently.
Understanding Your Singer Sewing Machine Components
Familiarizing yourself with your Singer sewing machine’s components is crucial for effective use. Learn about major parts, accessories, and their functions to ensure smooth operation and easy troubleshooting.
2.1 Major Parts of the Machine
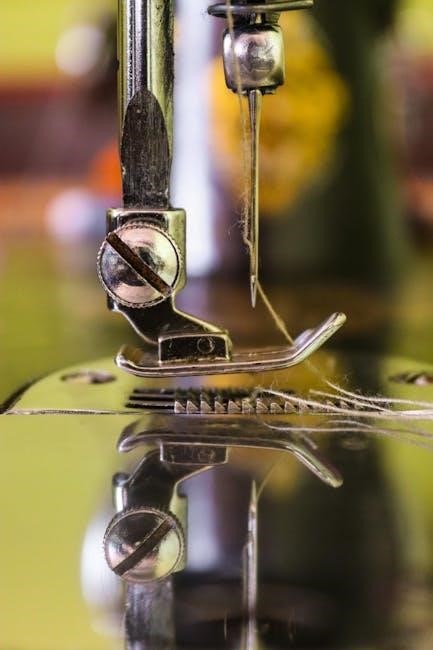
The Singer sewing machine features key components like the motor, needle bar, bobbin case, and spool pins. These parts work together to ensure smooth stitching. The heavy-duty metal frame provides durability, while the powerful motor handles tough fabrics. Understanding each part helps in proper usage and maintenance, ensuring years of reliable service for your sewing projects.
2.2 Types of Needles and Bobbins
The Singer sewing machine uses flat back needles and specific bobbin sizes. Needles vary by type (sharp, universal) and size, depending on fabric thickness. Bobbins must match the machine’s requirements. Using the correct needle and bobbin ensures smooth stitching and prevents thread breakage. Always refer to your user guide to confirm compatibility and maintain optimal performance for your sewing projects.
Setting Up Your Singer Sewing Machine
Setting up your Singer sewing machine involves unpacking, oiling, and threading. Follow the guide for proper assembly and initial adjustments to ensure smooth operation and longevity.
3.1 Unpacking and Initial Setup
Unpack your Singer sewing machine carefully, ensuring all accessories are included. Place it on a stable surface and remove any protective packaging. Before use, inspect for damage and refer to the manual for initial setup instructions to ensure proper function and safety. This step is crucial for a seamless sewing experience.
3.2 Oiling and Maintenance Tips
Regularly oil your Singer sewing machine to ensure smooth operation. Use Singer-branded oil for best results. Clean the bobbin area and tension discs to prevent thread jams. Check if your model requires internal oiling or is sealed. Refer to the owner’s manual for specific maintenance instructions. Proper care extends the machine’s lifespan and performance.
3.3 Threading the Machine
Proper threading is essential for smooth sewing. Start by turning off the machine. Use the correct thread type for your fabric. Follow the machine’s threading path, ensuring the thread is seated in the tension discs. Use the automatic needle threader if available. Gently pull the thread to remove slack. Test by sewing on scrap fabric. Incorrect threading can cause jams or breaks, so double-check your setup. Always consult your manual or online guides for specific model instructions.
Basic Operations and Functions
Master the fundamentals of your Singer sewing machine, including winding the bobbin, threading the needle, and performing basic stitches. These essential functions form the foundation of sewing.
4.1 Winding the Bobbin
Properly winding the bobbin is crucial for smooth sewing. Place the bobbin on the winder, guide the thread through the machine’s tension discs, and wind evenly to avoid uneven stitches. Cut the excess thread, leaving a small tail. Ensure the bobbin is securely placed in the machine before sewing. Always use the correct bobbin size and type for your Singer model to prevent issues. Refer to your manual for specific guidance.
4.2 Threading the Needle
Threading the needle is a straightforward process. Start by placing the thread on the spool pin and guide it through the tension discs. Loop the thread around the take-up lever and insert it through the needle’s eye from front to back. Gently pull the thread to ensure it’s properly seated. For easier threading, consider using the machine’s automatic needle threading feature, if available. Always refer to your Singer sewing machine’s manual for specific instructions to ensure correct thread placement and tension.
4.3 Basic Stitching and Sewing
Start by placing your fabric under the presser foot, aligning the edge with the machine’s guide. Select the straight stitch for basic sewing and ensure the needle is threaded correctly. Gently press the pedal to begin sewing, keeping fabric steady. For consistent results, use the stitch length and width controls to adjust settings for different fabrics. Always test stitches on scrap fabric before sewing your final project to ensure proper tension and alignment.

Advanced Features and Techniques
Explore advanced sewing capabilities, including special stitches, embroidery, and customizable settings. Experiment with decorative patterns and tailor your machine for various fabrics to elevate your sewing projects.
5.1 Special Stitches and Embroidery
Discover the creative potential of your Singer sewing machine with special stitches and embroidery features. Explore decorative patterns, floral designs, and intricate embroidery options. Use the Singer App for tutorials on complex stitching and learn to customize your projects with precision and style. These advanced features will help you create professional-looking embroidery and unique fabric designs effortlessly.
5.2 Customizing Settings for Different Fabrics
Adjust your Singer sewing machine settings to suit various fabrics. For heavy-duty materials like denim, use a heavier needle and increase stitch length. Delicate fabrics like silk require a finer needle and tighter tension. Experiment with thread types and presser feet to ensure optimal results. Refer to the Singer App or user manual for specific fabric customization guides and troubleshooting tips.

Troubleshooting Common Issues
Troubleshoot issues like thread jams, machine not turning on, or improper stitching. Refer to the Singer App, user manual, or online tutorials for solutions. Regular maintenance helps prevent problems and extends machine longevity. Always switch off the machine before making adjustments or repairs for safety.
6.1 Machine Not Turning On
If your Singer sewing machine won’t turn on, check the power cord and plug. Ensure it’s properly plugged into a working outlet. Verify the power button is functioning. Some models have a safety feature that disables the motor when the needle is in a certain position. Consult your user manual or Singer’s online support for specific troubleshooting steps. Always ensure the machine is switched off before making any adjustments or repairs for safety. Regular maintenance, like cleaning and oiling, can prevent such issues. If the problem persists, contact Singer’s customer service for professional assistance. This ensures your machine runs smoothly and extends its lifespan.
6.2 Thread Jamming or Breaking
If thread jams or breaks frequently, check for improper threading, incorrect needle size, or low-quality thread. Ensure the bobbin is correctly seated and tension settings are balanced. Regularly clean lint buildup around the needle area. If issues persist, consult your Singer user manual or contact their support for guidance. Proper maintenance can prevent such problems;
Vintage Singer Sewing Machine Tips
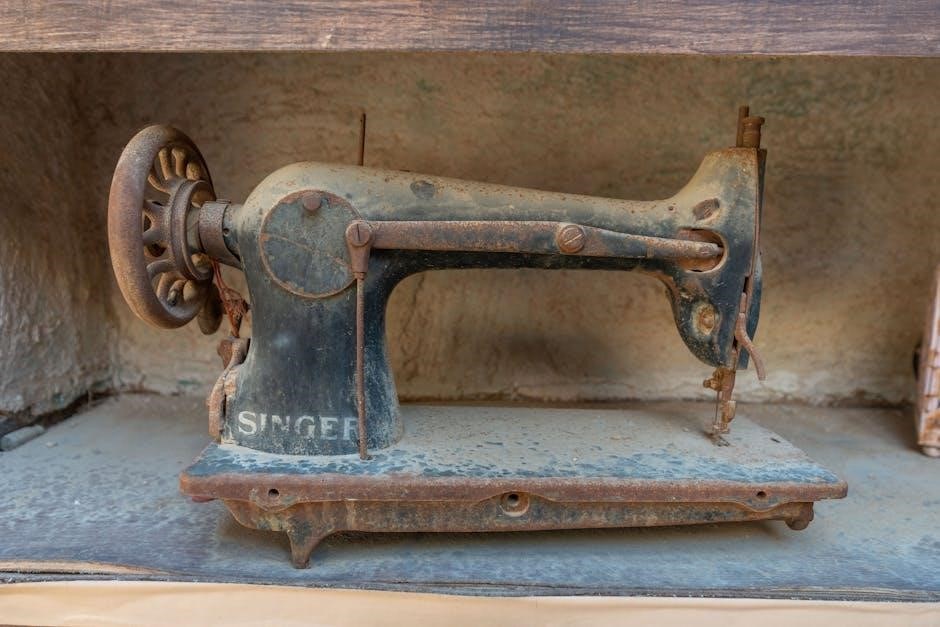
Vintage Singer machines are durable and crafted with precision. To maintain them, regularly oil mechanical parts and clean lint buildup. Find manuals for models like 15, 66, and 201 on Singer’s website. Store them in dry places to preserve functionality. Join sewing communities for restoration tips and troubleshooting advice.
7.1 Identifying Vintage Models
Identifying vintage Singer models involves checking serial numbers and production dates. Models like the 15, 66, and 201 are popular among collectors. Visit Singer’s official website or use community resources to verify authenticity. Look for distinctive features such as metal frames and mechanical components. Proper identification ensures accurate maintenance and restoration of your vintage machine.
7.2 Maintenance for Older Machines
Regular maintenance is crucial for older Singer sewing machines. Clean the machine thoroughly, oil mechanical parts, and inspect belts for wear. Use compatible needles and bobbins to prevent damage. For models requiring oil, apply a few drops to moving parts. Replace worn or rusty components promptly. Proper care ensures smooth operation and extends the life of your vintage Singer sewing machine.
Accessories and Attachments
Enhance your sewing experience with Singer’s wide range of accessories. From presser feet to storage cases, these tools optimize performance. Explore specialized attachments for embroidery, quilting, and more.
8.1 Essential Accessories for Sewing
Essential accessories like presser feet, needles, and bobbins are vital for optimal sewing. Singer offers a variety of presser feet, such as zipper, buttonhole, and walking feet, to handle different fabrics and techniques. Additional must-haves include seam rippers, tape measures, and thread cutters, ensuring a smooth and efficient sewing process. These tools enhance your machine’s functionality and versatility.
8.2 Using Presser Feet
Presser feet are interchangeable attachments that enhance sewing precision. For zippers, use the zipper foot; for buttons, the buttonhole foot. Always switch off the machine before changing feet. Attach them securely to ensure proper fabric handling. Using the right presser foot improves stitch quality and simplifies tasks like hemming or quilting, making your sewing projects more efficient and professional.

Resources and Support
Singer provides extensive support through the Singer App, offering free Owner’s Class videos and lessons. Online communities, forums, and FAQs offer troubleshooting tips and solutions. Access tutorials, manuals, and updates to enhance your sewing experience and stay informed about machine maintenance and new features.
9.1 Singer App and Online Tutorials
The Singer App offers free Owner’s Class videos and lessons, guiding users through setup, maintenance, and advanced techniques. Online tutorials cover topics like threading, stitching, and troubleshooting. These resources help users master their machines and explore creative possibilities. The app also provides access to FAQs, manuals, and updates, ensuring a seamless sewing experience for all skill levels.
9.2 Finding Instruction Manuals
Instruction manuals for Singer sewing machines are available on the official Singer website. Users can search by model number or machine type to download PDF manuals. For vintage models, websites like singerco.com.au offer archives, including manuals for classic models like the Singer Featherweight 221. These guides provide detailed setup, maintenance, and troubleshooting instructions.
9.3 Online Communities and Forums
Online communities and forums are invaluable for Singer sewing machine users. Platforms like Singer’s official forums, Singer App, and sewing groups on social media offer tips, troubleshooting advice, and project ideas. YouTube tutorials and blogs dedicated to Singer machines also provide visual guides for setup, maintenance, and advanced techniques. Engaging with these communities fosters learning and creativity among sewers of all skill levels.
Mastering your Singer sewing machine involves practice, patience, and proper care. Regular maintenance, troubleshooting, and exploring creative stitches will enhance your sewing experience. Stay curious, experiment with new techniques, and enjoy the journey of creating something truly unique with your Singer machine!
10.1 Best Practices for Longevity
Regularly clean and oil your Singer sewing machine to ensure smooth operation. Store it in a dry place, away from dust. Use the correct needles and bobbins for your machine. Avoid using excessive force, which can damage internal components. Refer to your user guide for specific maintenance tips tailored to your model. This will extend the life of your machine and maintain its performance.
10.2 Encouragement for Continuous Learning
Continue exploring your Singer sewing machine’s potential by utilizing online tutorials and the Singer app for new techniques. Join sewing communities to share ideas and learn from others. Experiment with different fabrics and stitches to expand your skills. Embrace challenges and celebrate progress—every project is a step toward mastery. Happy sewing!