
Goodman GSX14 Installation Manual PDF: A Comprehensive Plan
Accessing the Goodman GSX14 installation manual PDF provides crucial, step-by-step guidance for HVAC professionals and DIYers, ensuring correct setup and long-term maintenance.
The Goodman GSX14 series represents a popular choice for homeowners seeking reliable and efficient air conditioning. This split system outdoor unit, often paired with various indoor coils, delivers cooling performance utilizing R410A refrigerant. Understanding the specifics of the GSX14, as detailed in the official installation manual, is paramount for a successful installation.
Proper installation directly impacts system longevity and efficiency. The manual covers essential aspects, from unpacking and component verification to detailed wiring diagrams (like the GSX14 0181L on pages 72-73). It emphasizes safety precautions and adherence to local codes. HVAC.com serves as a valuable resource for locating parts information related to the GSX14 series, complementing the installation guidance found within the PDF documentation.
Safety Precautions & Warnings

The Goodman GSX14 installation manual PDF prominently features critical safety information. Installers and owners must read and comply with all accompanying instructions and symbols to mitigate risks. Ignoring these warnings increases the potential for personal injury, property damage, or product malfunction.
Specifically, the manual stresses the importance of protecting refrigerant tubing during installation – using plugs to maintain cleanliness and prevent contamination. Proper tubing preparation, including square cuts and burr removal, is also crucial. Electrical safety is paramount; always verify electrical data on the unit’s S&R plate before wiring. Prioritizing these precautions ensures a safe and reliable system.
Unpacking and Inspection
Upon receiving the Goodman GSX14 unit, the installation manual PDF emphasizes a thorough unpacking and inspection process. Immediately check for any shipping damage – document any issues with the carrier. A crucial step involves verifying all components against the packing list to ensure nothing is missing.
The manual highlights the importance of keeping refrigerant tubing clean and dry throughout the installation. Install plugs immediately after cutting the tubing to prevent contamination. Ensure tubing ends are cut squarely, are round, and free from burrs. Careful inspection and preparation at this stage contribute to a successful installation;
Checking for Damage During Shipping
The Goodman GSX14 installation manual PDF stresses the immediate importance of inspecting for shipping damage. Carefully examine the unit for any visible dents, scratches, or signs of mishandling. Document any damage thoroughly with photographs before the unit is moved or unpacked further.
Report any observed damage to the carrier immediately, as this is crucial for filing a claim. Do not attempt to install a damaged unit. Note any damage on the delivery receipt before signing. This initial inspection safeguards against potential issues and ensures a smooth installation process, as outlined in the manual.
Component Verification Against Packing List
The Goodman GSX14 installation manual PDF emphasizes a meticulous component verification process. Upon unpacking, carefully compare all received parts against the detailed packing list included with the unit. Ensure every item – including refrigerant lines, mounting hardware, electrical components, and documentation – is present and accounted for.
Missing components can delay installation and potentially compromise system performance. Note any discrepancies immediately and contact the supplier to obtain replacements before proceeding. This verification step, detailed in the manual, prevents costly errors and ensures a complete and functional HVAC system installation.
System Requirements & Planning
Prior to Goodman GSX14 installation, the manual PDF stresses thorough system requirements and planning. Crucially, verify electrical data on the unit’s S&R plate; this ensures compatibility with the existing electrical infrastructure. Accurate refrigerant line sizing is also paramount for optimal efficiency, as detailed within the documentation.
Furthermore, careful airflow considerations and static pressure checks (ideally .5 WC or less) are vital. The manual provides airflow tables for indoor unit specification. Proper planning, referencing the manual, guarantees a correctly charged system – initially for 15ft of line, with final adjustments per installation instructions – and avoids performance issues.
Electrical Data Verification (S&R Plate)
The Goodman GSX14 installation manual PDF emphatically instructs installers to always check the unit’s S&R (Serial and Rating) plate for precise electrical data before commencing any wiring. This plate contains vital information regarding voltage, amperage, and other electrical specifications crucial for a safe and functional installation.
Ignoring this step can lead to serious consequences, including equipment damage, electrical hazards, and voided warranties. The manual stresses that electrical data can vary between models, making S&R plate verification non-negotiable. Accurate data ensures compatibility with the power supply and prevents operational failures.
Refrigerant Line Sizing
The Goodman GSX14 installation manual PDF highlights the critical importance of proper refrigerant line sizing for optimal system performance and efficiency. Incorrect line sizes can lead to issues like reduced cooling capacity, compressor damage, and refrigerant leaks.
The manual directs installers to consult detailed charts and tables within the documentation, factoring in the unit’s capacity and the length of the refrigerant lines. It emphasizes that line sizing isn’t a one-size-fits-all process and requires careful calculation. Proper sizing ensures correct refrigerant flow, maximizing the system’s cooling potential and longevity.
Airflow Considerations & Static Pressure
The Goodman GSX14 installation manual PDF stresses the significance of maintaining correct airflow and static pressure for efficient operation. Total static pressure should be 0.5 WC or less to avoid strain on the blower motor and reduced cooling capacity.
The manual provides airflow tables within the installation guide and the indoor unit’s specification sheet. These tables are essential for determining the appropriate airflow for the specific installed unit. Proper airflow ensures adequate heat transfer and prevents issues like frozen coils or overheating. Always verify airflow after installation to confirm optimal performance.
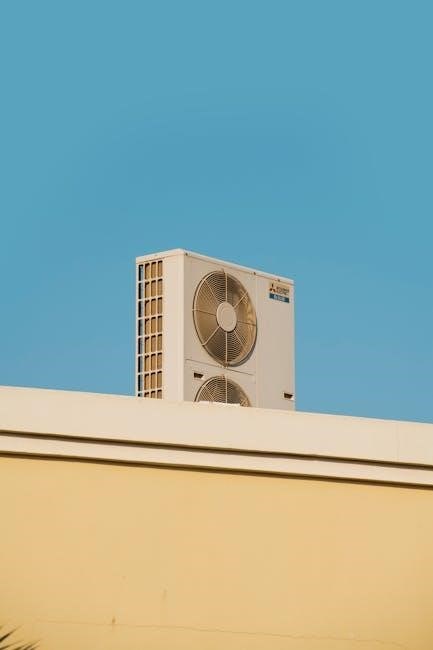
Installation Procedure ⏤ Outdoor Unit
The Goodman GSX14 installation manual PDF details crucial outdoor unit procedures. Begin with mounting, ensuring a level pad meeting specified requirements for stability and vibration reduction. Next, carefully connect refrigerant lines, verifying tightness to prevent leaks.
Electrical wiring is critical; the manual references pages 72-73 for the GSX14 0181L diagram. Always double-check the unit’s S&R plate for accurate electrical data before connecting power. Prior to installation, install plugs on refrigerant tubing to maintain cleanliness and prevent contamination during the process.
Mounting the Unit (Pad Requirements)
The Goodman GSX14 installation manual PDF emphasizes proper pad preparation for stable outdoor unit mounting. The pad must be level, solid, and capable of supporting the unit’s weight, including potential snow or ice accumulation.
Ensure adequate clearance around the unit for airflow and service access, as detailed in the manual. The pad’s dimensions should exceed the unit’s base dimensions. Consider using a pre-fabricated concrete pad or constructing one according to local codes. Vibration isolation is also important; rubber pads can minimize noise transmission.
Refrigerant Line Connection
The Goodman GSX14 installation manual PDF stresses the importance of clean, properly sized refrigerant lines. After cutting the tubing, immediately install plugs to prevent contamination and moisture ingress. Tubing must be cut square, deburred, and free of any obstructions.
Proper brazing techniques, using appropriate brazing alloy and flux, are critical to ensure leak-free connections. The manual details specific procedures for connecting the liquid and suction lines, emphasizing the need for a tight seal. Always pressure test the refrigerant lines after connection, before charging the system, to verify integrity.

Electrical Wiring (GSX14 0181L Diagram ― Pages 72-73)
The Goodman GSX14 0181L wiring diagram, located on pages 72 and 73 of the installation manual PDF, is essential for correct electrical connections. Always verify the unit’s S&R plate data before wiring, confirming voltage and amperage requirements.
Proper grounding is paramount for safety and system performance. The diagram clearly illustrates the connection points for power supply, control wiring, and safety devices. Ensure all connections are secure and comply with local electrical codes. Double-check wiring before energizing the unit to prevent damage or hazards.
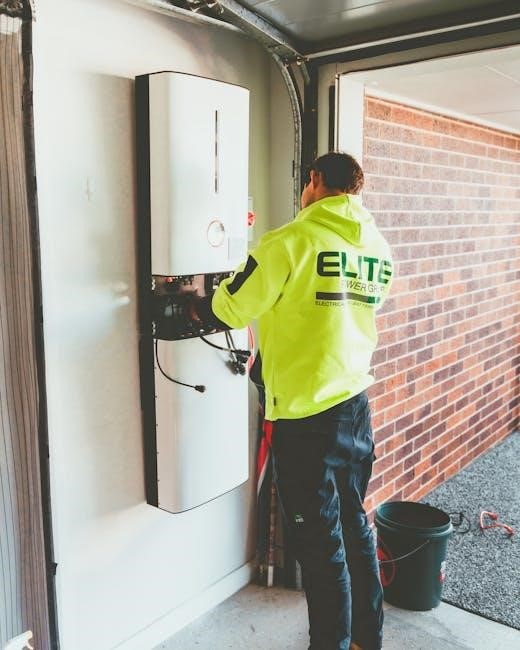
Installation Procedure ⏤ Indoor Unit
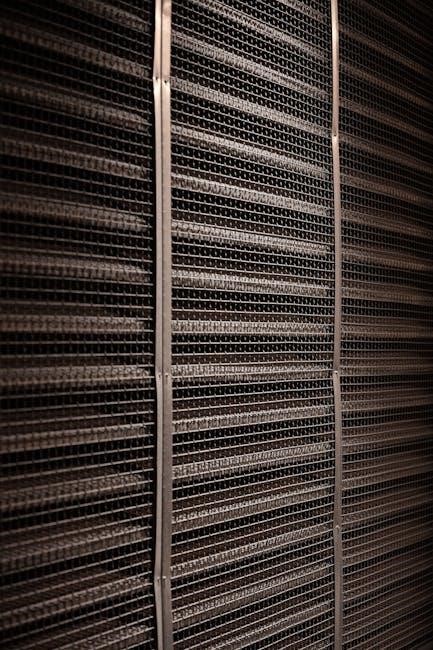
The indoor unit installation requires careful attention to coil placement and airflow optimization. Ensure the evaporator coil is securely installed and properly leveled for efficient heat transfer. Connecting to the ductwork must be airtight to prevent energy loss and maintain system efficiency.
Airflow is critical; verify static pressure remains at .5 WC or less, referencing the installation manual and the indoor unit’s specification sheet for appropriate airflow tables. Proper ductwork sizing and insulation are vital. A correctly installed indoor unit contributes significantly to overall system performance and comfort.
Coil Installation & Airflow Setup
Securely install the evaporator coil, ensuring it’s level to maximize heat transfer efficiency. Proper coil installation is foundational for optimal system performance. Airflow setup demands meticulous attention; consult the Goodman GSX14 installation manual PDF for specific airflow tables related to the installed indoor unit.

Verify total static pressure remains at or below .5 WC. Incorrect airflow significantly impacts cooling capacity and energy consumption. Proper ductwork connections and insulation are essential. Referencing the manual guarantees adherence to Goodman’s specifications, leading to a reliable and efficient HVAC system.
Connecting to Ductwork
Ensure all ductwork connections are airtight and properly sealed to prevent air leakage, maximizing system efficiency. The Goodman GSX14 installation manual PDF details specific requirements for duct sizing and materials. Proper insulation of ductwork is crucial, especially in unconditioned spaces, minimizing energy loss.
Inspect for any obstructions within the duct system that could restrict airflow. Securely fasten all duct connections using appropriate methods, like duct tape or mastic sealant. Refer to the manual’s diagrams for correct ductwork configurations, guaranteeing optimal airflow and system performance. A well-connected duct system is vital for comfort.
Refrigerant Charging & System Check
The Goodman GSX14 unit arrives with a refrigerant charge calculated for 15 feet of refrigerant line length; adjustments are essential for longer runs. Always consult the installation manual PDF for precise charging procedures and superheat/subcooling targets. Verify electrical data on the unit’s S&R plate before commencing the charging process.
Perform a leak check after connecting refrigerant lines, utilizing an electronic leak detector. The final charge procedure, detailed in the installation instructions, requires careful monitoring of system pressures and temperatures. Accurate refrigerant charge is critical for optimal performance and longevity, preventing compressor damage and ensuring efficiency.
Initial Charge & 15ft Line Length Adjustment
The Goodman GSX14 air conditioner is pre-charged with refrigerant, sufficient for 15 feet of connected refrigerant tubing. The installation manual PDF clearly states that any line length exceeding this requires a precise adjustment to the refrigerant charge. This initial charge is a baseline, not a final setting.
Before making adjustments, ensure all connections are leak-tight. Refer to the unit’s S&R plate for specific refrigerant type and capacity. Carefully follow the superheat or subcooling target values outlined in the manual, adjusting refrigerant slowly while monitoring system pressures and temperatures for optimal performance.
Final Charge Procedure (Per Installation Instructions)
The Goodman GSX14 installation manual PDF emphasizes a meticulous final charge procedure. After the initial charge adjustment for line length, a precise system evaluation is critical. This involves monitoring superheat or subcooling at the evaporator, ensuring they align with the manufacturer’s specified values.

System charge adjustments must be made incrementally, allowing the system to stabilize between each change. The manual details specific procedures for both TXV and fixed orifice metering devices. Accurate airflow measurement is also essential, as it directly impacts refrigerant charge requirements. Always consult the complete installation instructions for detailed guidance.
Wiring Diagrams & Electrical Connections
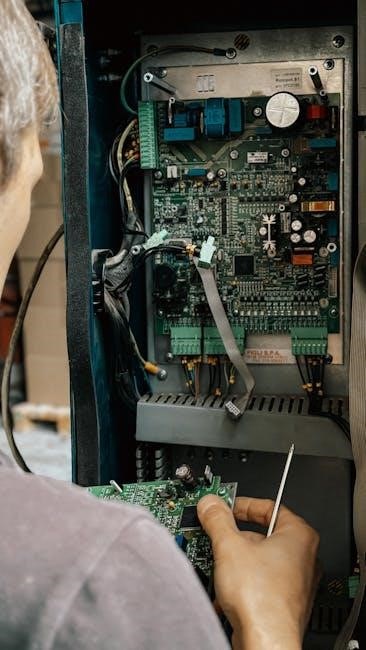
The Goodman GSX14 installation manual PDF provides detailed wiring schematics essential for correct electrical connections. Specifically, pages 72 and 73 contain the wiring diagram for the GSX14 0181L model, illustrating component connections and voltage requirements.
Proper grounding is paramount for safety and system performance. The manual stresses verifying electrical data on the unit’s S&R plate before making any connections. Technicians should adhere strictly to local electrical codes and utilize appropriately sized wiring and overcurrent protection. Incorrect wiring can lead to equipment damage or hazardous conditions.
Detailed Wiring Schematics

The Goodman GSX14 installation manual PDF features comprehensive wiring schematics, crucial for technicians ensuring correct electrical connections. These schematics clearly illustrate the wiring configurations for various components, including the compressor, fan motor, and control board.
Diagrams depict wire colors, terminal designations, and voltage/amperage specifications. The manual specifically highlights the GSX14 0181L wiring diagram on pages 72-73. Technicians must carefully follow these schematics, verifying all connections before energizing the system. Accurate wiring is vital for safe operation and preventing potential equipment failures.

Troubleshooting Common Issues
The Goodman GSX14 installation manual PDF aids in diagnosing frequent problems. Identifying refrigerant leaks is a key focus, with guidance on leak detection methods and proper repair procedures. Addressing airflow issues is also covered, emphasizing the importance of correct static pressure – ideally .5 WC or less – and verifying airflow tables within the manual and unit spec sheets.
The manual stresses checking the unit’s S&R plate for accurate electrical data. Proper system charge is critical; adjustments are needed based on line length, referencing the installation instructions for the final charge procedure. Consulting the service manual is recommended for complete charging information.
Identifying Refrigerant Leaks
The Goodman GSX14 installation manual PDF doesn’t detail specific leak detection methods, but emphasizes the importance of addressing leaks promptly. Proper installation, including careful tubing handling, minimizes leak potential. Always ensure tubing is cut square, ends are round and burr-free, and thoroughly cleaned to prevent contamination—a common cause of future leaks.
The manual implicitly suggests regular system checks as preventative maintenance. While not explicitly stated, a loss of cooling capacity is a primary indicator of a refrigerant leak. Referencing the service manual alongside the installation PDF provides comprehensive guidance for diagnosis and repair, ensuring system efficiency and longevity.
Addressing Airflow Problems
The Goodman GSX14 installation manual PDF stresses maintaining correct airflow for optimal performance. Total static pressure should be 0.5 WC or less. Airflow tables, crucial for proper setup, are located within the installation manual and the indoor unit’s specification sheet. Insufficient airflow can lead to reduced efficiency and potential system damage.
Troubleshooting airflow issues involves verifying ductwork connections and ensuring filters are clean. The manual doesn’t detail specific diagnostic procedures, but emphasizes referencing the airflow tables to confirm the installed unit’s requirements are met. Correct airflow is paramount for efficient cooling and heating, as outlined in the documentation.
Maintenance & Cleaning
The Goodman GSX14 installation manual PDF highlights routine maintenance for longevity. Filter replacement is a key component, ensuring consistent airflow and preventing strain on the system. Regular cleaning of the coils is also vital; the manual details procedures to maintain optimal heat transfer efficiency.
Consistent upkeep, as described in the documentation, extends the unit’s lifespan and minimizes potential repairs. While the PDF doesn’t offer a detailed maintenance schedule, it underscores the importance of adhering to best practices for HVAC system care. Proper maintenance, guided by the manual, ensures reliable performance.
Filter Replacement
The Goodman GSX14 installation manual PDF emphasizes regular filter replacement as a critical maintenance task. Dirty filters restrict airflow, reducing efficiency and potentially damaging the system. The manual doesn’t specify a precise replacement frequency, but recommends checking filters monthly and replacing them as needed, depending on usage and environmental conditions.
Choosing the correct filter size and type is crucial for optimal performance. The manual may contain details on compatible filter specifications. Consistent filter changes, guided by the PDF’s recommendations, contribute to cleaner air and a longer lifespan for your Goodman GSX14 unit.
Coil Cleaning Procedures
The Goodman GSX14 installation manual PDF details the importance of maintaining clean evaporator and condenser coils for optimal performance. Dirt and debris accumulation reduces heat transfer efficiency, increasing energy consumption and potentially leading to system failure. The manual recommends periodic coil cleaning, typically annually, or more frequently in dusty environments.
Cleaning involves carefully removing the coil guard (if applicable) and gently cleaning the coils with a specialized coil cleaner, following the product’s instructions. Avoid bending the fins. The PDF stresses the importance of rinsing thoroughly and ensuring the coils are completely dry before reassembling the unit, safeguarding against corrosion and maintaining efficiency.
Resources & Documentation
Locating the official Goodman GSX14 installation manual PDF is paramount for a successful installation and ongoing maintenance. Goodman’s website provides direct access to this essential document, alongside spec sheets and service manuals. HVAC.com emerges as a valuable resource for sourcing Goodman HVAC parts, simplifying replacements and repairs;
Furthermore, the manual itself references crucial data plates (S&R plates) for electrical specifications. Remember to consult these plates before wiring. Utilizing these resources ensures adherence to manufacturer guidelines, maximizing system efficiency and longevity. Always prioritize official documentation for accurate and safe operation of your Goodman GSX14 system.
Locating the Official Goodman GSX14 Installation Manual PDF
Finding the official Goodman GSX14 installation manual PDF is readily achievable through Goodman’s official website. A quick search utilizing the model number – GSX14 – will direct you to the downloadable document. Alternatively, various HVAC-focused websites archive these manuals for convenient access. Ensure the PDF originates from a reputable source to guarantee accuracy and completeness.
This manual contains vital information, including wiring diagrams (pages 72-73 for the GSX14 0181L model), refrigerant charging procedures, and safety precautions. Downloading and reviewing this document before commencing installation is strongly advised for both professionals and DIY enthusiasts.
HVAC.com for Parts Information
When sourcing replacement parts for your Goodman GSX14 system, HVAC.com serves as a valuable resource. This platform offers a comprehensive catalog of Goodman HVAC components, simplifying the parts procurement process. Utilizing the model number, GSX14, on HVAC.com allows for precise part identification and ordering.
Beyond parts, HVAC.com often provides supplementary information, potentially including links to installation manuals and troubleshooting guides. Remember to cross-reference part numbers with your Goodman GSX14 installation manual PDF to ensure compatibility and correct installation. Reliable parts sourcing is crucial for maintaining system efficiency and longevity.